
Introduction
Planet Explorer is your indispensable guide to Planet Earth.
Don’t go exploring without it!
Planet Explorer uses three sources of information covering every key tourist and historic site on the planet:
• Every geolocated Wikipedia page
• Every Wikivoyage page
• Local tourist sights from OpenStreetMaps
It also offers practical holiday information for wherever you want to go:
• Accommodation
• Food and Entertainment
• Transportation (car and bike rental, fuel, e-Vehicle charging points)
• Leisure Activities
• Emergency contacts (police, medical)
These practical locations are all sourced from the world-wide OpenStreetMap database.
The Take Me There feature allows turn-by-turn navigation to any location of interest, using Apple Maps.
Contribute new locations! Become an OpenStreetMap Contributor and you can create new locations or edit existing locations in the OpenStreetMap database, which provides world-wide coverage. The OpenStreetMap Contributor capability is enabled through an in-App purchase (5,49€, US$4.99 or local-currency equivalent).
The companion App for Apple Watch allows you to search the nearest Wikipedia, Wikivoyage or OpenStreetMap locations.
Tabs
The Planet Explorer App consists of five tabs:
 The Map
 The available Layers of tourism data
 The list of Nearby locations
 The list of Favorite locations
 Settings
Map
The Map tab is the best way to view all the Wikipedia articles, Wikivoyage pages and OpenStreetMap locations in a local area:
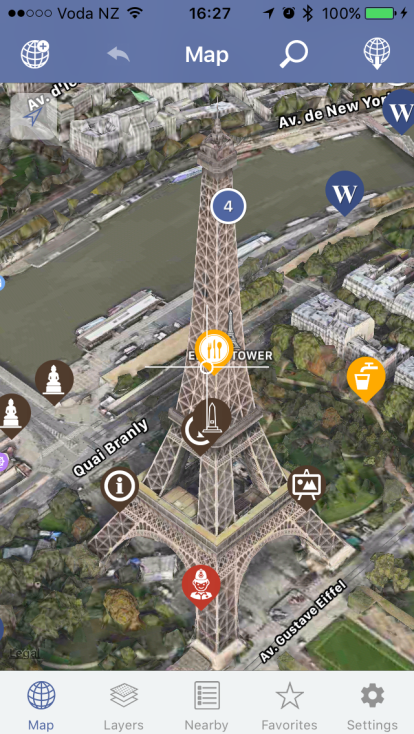
To download all of the Touristic locations in a selected area, pan and zoom the Map and then press the ![]() (Download) button. All the Wikipedia, Wikivoyage and OpenStreetMap locations within the visible Map will be downloaded and appear on the Map, marked with an appropriate icon:
(Download) button. All the Wikipedia, Wikivoyage and OpenStreetMap locations within the visible Map will be downloaded and appear on the Map, marked with an appropriate icon:
- Wikipedia pages are marked with a
 .
. - Wikivoyage pages are marked with a
 .
. - OpenStreetMap locations are marked with a layer-specific icon, e.g.
- A photo-worthy tourist sight is marked as:

- A cafe appears as:

- Public toilets are shown as:

- etc.
- A photo-worthy tourist sight is marked as:
Where two or more locations are clustered in a small area, these appear as a “cluster” icon, e.g. ![]() . The cluster’s number indicates how many locations it represents (in this case, four). Tap on a cluster icon to expand it and zoom in to the locations which make up that cluster. Tapping on the
. The cluster’s number indicates how many locations it represents (in this case, four). Tap on a cluster icon to expand it and zoom in to the locations which make up that cluster. Tapping on the ![]() (zoom previous) button reverses the effect of tapping on a cluster.
(zoom previous) button reverses the effect of tapping on a cluster.
Tapping on an individual location icon on the Map will bring up a summary callout:
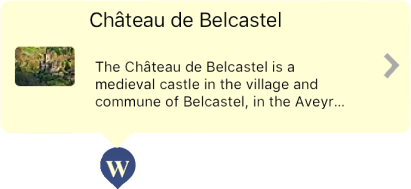
Tapping the disclosure button (![]() ) brings up the action menu for that location. For example:
) brings up the action menu for that location. For example:
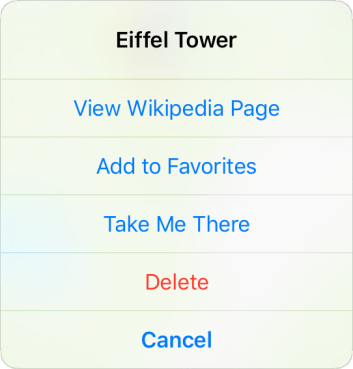
The first entry in the Action menu allows you to view the location in detail. In the case of a Wikipedia or Wikivoyage location, this action will download and display the corresponding Wikipedia or Wikivoyage page. In the case of an OpenStreetMap location, the tags (attributes) associated with that location will be displayed.
For example, here’s the Wikipedia page displayed when you select “View Wikipedia Page” for the Eiffel Tower:

And here’s what you see if you tap on the icon for the Jules Verne restaurant (which is situated on the 2nd level of the Eiffel Tower). This is an OpenStreetMap location, and selecting “View Details” for this location results in the following page:
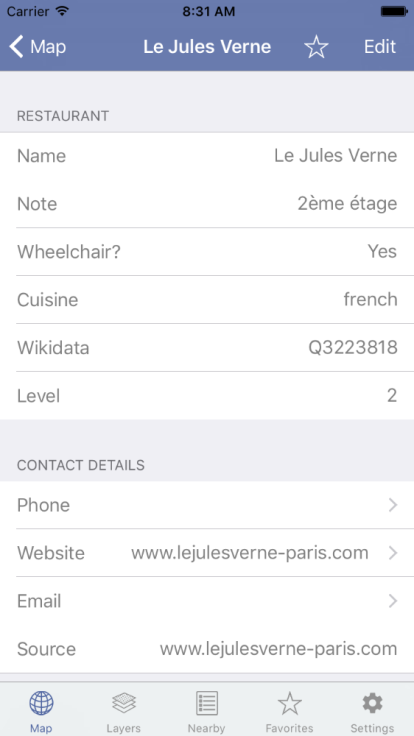
A few notes:
- The Edit button allows you to actually edit one or more of the fields describing an OpenStreetMap location. Your edits are saved to your iOS device and are also uploaded to the servers of OpenStreetMap.org, for the benefit of other travelers around the world. However the Editing capability requires you to register with OpenStreetMap.org, and to purchase the “OpenStreetMap Contributor” option (In-App purchase). For more details, see Editing OpenStreetMap below.
- Some of the displayed fields are external links, e.g. the phone number, website, email address, etc. Tapping on those links will activate them.
- For example, if there was a phone number for the Jules Verne restaurant (there isn’t), you can tap on this field to call the restaurant and make a reservation (don’t leave it too late: they are always heavily booked!).
- Tapping on an email address starts the Mail app, so you could send the restaurant an email.
- Tapping on a web address opens this address in Safari.
- The Favorites button (
 ) allows you to add this location to your Favorites list.
The Layers Tab
The Layers tab allows you to specify which “layers” of information you want to see displayed on the Map or in the Nearby and Favorites lists:
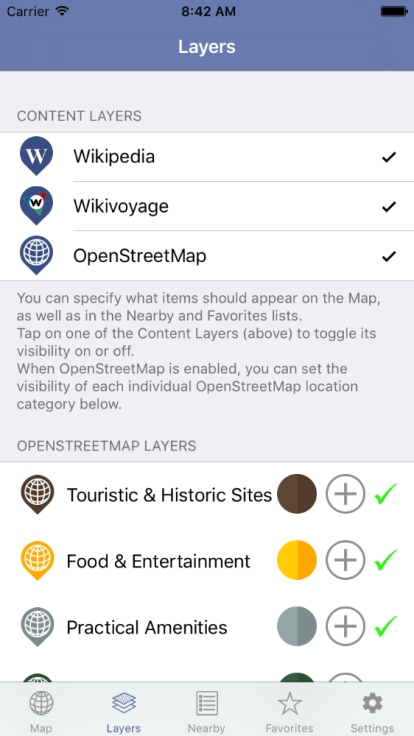
Just tap on the content layers to quickly turn them on or off.
When the OpenStreetMap content layer is enabled, you will see the full listing of available OpenStreetMap layers, grouped into 7 categories.
- You can change the color of the icons used to represent each category by tapping on the color icon (e.g.
 ).
). - You can expand a group and view all of the layers within it by tapping the expand button
 . Tap the contract button
  to reverse the expansion.
 - You can tap on a category group, or on an individual layer, to make it visible
 or invisible
  .
.
The Layers tab allows fine control of the visibility and appearance of locations on the Map, or in the Nearby or Favorites lists. Changing Layer settings does not alter what is stored in the Planet Explorer database, however. It merely alters their visibility and appearance.
The Nearby Tab
The Nearby tab downloads and displays the nearest touristic locations, sorted by increasing distance from your current location (or from the center of the Map, if you aren’t using GPS):
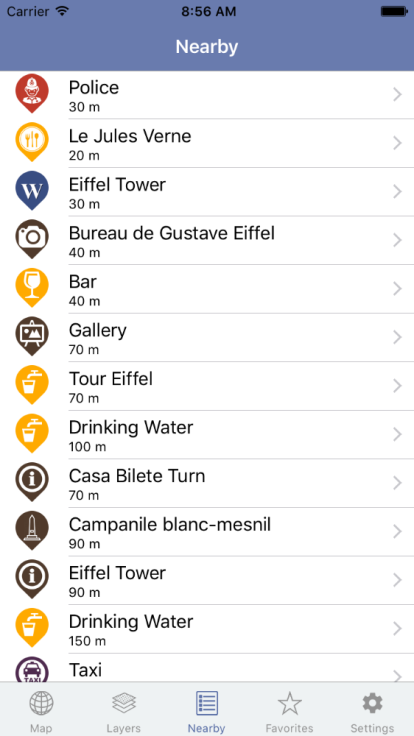
Just tap on one of these locations to view the Action Menu (from which you might choose to View Details, Edit the location, Navigate to it, etc).
Favorites
The Favorites tab provides immediate access to all your Favorite locations:
You can add a location to the Favorites list in several ways:
- by tapping its location on the Map, and selecting Add to Favorites
- by tapping on it in the ‘Nearby’ list, and selecting Add to Favorites
- By tapping the
 button when viewing the article’s page image or detailed page content.
Remove an entry from the Favorites list by:
- Tapping on it and selecting Remove from Favorites
- Tapping the
 button which is shown when viewing the page’s image or detailed page content.
Favorites are visually distinguished from other locations by a Map icon with a darker outline: ![]() . Clusters of locations which contain one or more Favorites also have a darker outline:
. Clusters of locations which contain one or more Favorites also have a darker outline: ![]() .
.
Settings
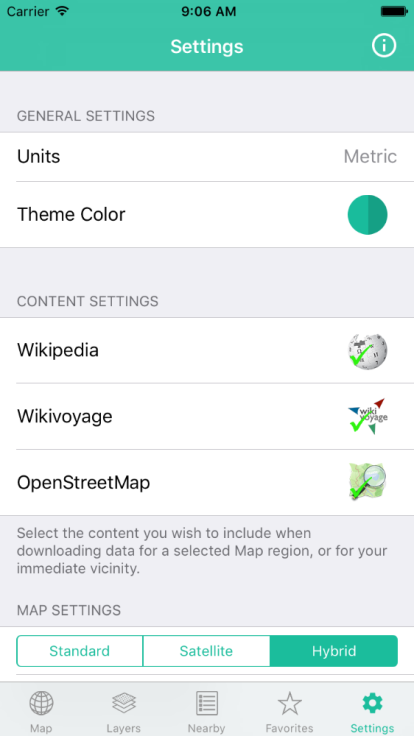
You can configure many aspects of Planet Explorer, including:
- Whether distances are displayed in metric or imperial units
- The Theme color (the example above is called “Mint”)
- The Map, which can be one of Apple’s three map types, in 2D or 3D.
- The search radius for the Nearby tab
- The App’s UI language (currently English and Français are supported).
- The Wikipedia article language setting determines which “edition” of Wikipedia or Wikivoyage you will be accessing. Planet Explorer supports content for the 30 most popular Wikipedia languages, which are:
- English
- Cebuano
- Svenska
- Deutsch
- Nederlands
- Français
- Pусский
- Italiano
- Español
- Winaray
- Polski
- Tiếng Việt
- 日本語
- Português
- 中文
- Yкраїнська
- فارسی
- Català
- العربية
- Norsk Bokmål
- Srpskohrvatski
- Suomi
- Magyar
- Bahasa Indonesia
- 한국어
- čeština
- Română
- Cрпски
- Türkçe
- Bahasa Melayu
- Euskara
- български
- Dansk.
- By default, Planet Explorer will display Wikipedia and Wikivoyage articles in the default language of your iPhone’s (or iPad’s) locale.
- Further down the Settings page, you can also:
- Enable and configure editing of OpenStreetMap locations (see the next section for more details).
- Clear the Planet Explorer database. You might want to download locations for a region prior to going on vacation, but then to delete those locations before your next vacation. You can delete all locations in the database, or just those locations near (or far) from the current Map center.
- You can view the ‘Welcome’ (Getting Started) tutorial, in case you missed or skipped it previously.
GPS Location and Navigation
Turn on GPS location by tapping the ![]() button near the top-left corner of the Map. This button will disappear when GPS is running, but will re-appear if you manually pan or zoom the Map to another location.
button near the top-left corner of the Map. This button will disappear when GPS is running, but will re-appear if you manually pan or zoom the Map to another location.
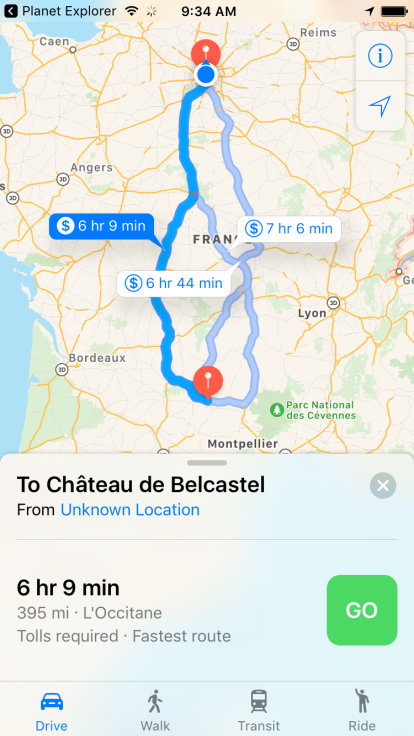
Take Me There
You can tap on any location and select Take Me There from the Action Menu. You can select your preferred mode of transport, and whether you require directions from your current GPS position or the Map’s center (e.g. when planning ahead, prior to a vacation). Then press Go! to generate driving or walking directions, together with travel time and distance. In general you will find there is a recommended route and one or more alternative routes (depending upon the distance and other factors such as motorway tolls, etc). Select your preferred route to navigate using the Apple Maps App (which provides turn-by-turn directions):
Editing OpenStreetMap
OpenStreetMap is an amazing resource. Like Wikipedia and Wikivoyage, it is “crowd-sourced” and anyone can use or contribute to it. And our individual contributions can be really important, because despite the amazing wealth of information already stored in OpenStreetMap, there are always new locations to be recorded, and the world is constantly changing, so details need to be kept up-to-date.
If you wish to become an OpenStreetMap Contributor and use Planet Explorer to edit existing OpenStreetMap locations, or create new ones, you need to do two things:
- Register with OpenStreetMap.org, and
- Purchase the “OpenStreetMap Contributor” capability within Planet Explorer (In-App Purchase).
You can do both by tapping on Enable OpenStreetMap Editing in the Settings tab.
Planet Explorer provides you with a Register New Account button, which leads you through the OpenStreetMap registration process (alternatively, you can register with OpenStreetMap on your PC, laptop or tablet, or you can use an existing registration).
Planet Explorer will also invite you to purchase the “OpenStreetMap Contributor” option. This is an In-App purchase (US$4.99, €5,49 or local currency equivalent)
Having purchased the “OpenStreetMap Contributor” option, and registered with OpenStreetMap.org, you can then enter your login credentials (username and password) and tap Login to confirm that these credentials are correct.
You can now tap the Create New Location (![]() ) button to create a new OpenStreetMap location. And you can tap the Edit button or Action Menu entry to edit an existing OpenStreetMap location.
) button to create a new OpenStreetMap location. And you can tap the Edit button or Action Menu entry to edit an existing OpenStreetMap location.
Notes:
- Please follow the policies of OpenStreetMap.org at all times. In particular, ensure that data you enter is not covered by 3rd party copyright and conforms to common standards of privacy and decency.
- Always be aware that anything you edit is visible to all OpenStreetMap users and contributors, worldwide. We are collectively responsible for the quality of OpenStreetMap data, and should take care to be accurate when recording new locations or editing existing ones.
- Wherever possible, use GPS to precisely position a new OpenStreetMap location.
- Planet Explorer supports creation and editing of OpenStreetMap “point” locations only. These are called “nodes” in OpenStreetMap parlance. The creation of linear or polygonal locations (“ways”/”relations”) in OpenStreetMap is not currently supported.
- Planet Explorer supports the creation of approximately 100 different layer classes, corresponding to the layers and groups available in the Layers tab.
- Planet Explorer does not currently support the moving of an existing OpenStreetMap location. You can edit any of the fields belonging to an existing location, but you cannot edit its position. If you come across an existing OpenStreetMap location which has an incorrect position, you can either delete it and re-create it in the correct position, or you can use a PC or laptop to reposition the existing location at http://www.openstreetmap.org.
The Apple Watch Companion App
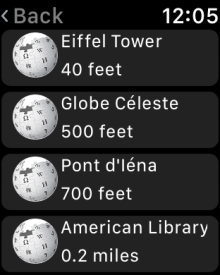
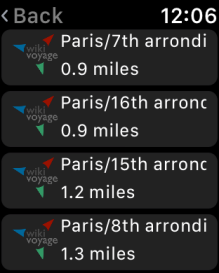
For the ultimate iTourist experience, we recommend that you run Planet Explorer on an iPhone or iPad. But for your convenience when traveling, you can also run “Nearby Search” queries on your Apple Watch.
You can choose whether to search Wikipedia, Wikivoyage or OpenStreetMap, and the Settings allow you to select a search radius and the specific OpenStreetMap layer groups that interest you:


Privacy
We value our privacy, and vow to protect yours. The Planet Explorer App does not record or retain any of your personal information.
Planet Explorer only accesses your GPS location with your permission, and does not record or transmit that location, except when you create new OpenStreetMap locations using your iOS device’s GPS position (in which case newly-created locations are stored in the OpenStreetMap.org database).
Availability
![]()
Supported Platforms
Planet Explorer runs on iPhones and iPads running iOS 10 or later.
A licensed user can run Planet Explorer on all iPhones and iPads associated with their Apple ID, per Apple’s standard App licensing terms.
For iPhone users, the optional Apple Watch Companion App supports watchOS 3 or later.
